Monday 29 April 2019

Plentiful Bouquet

Hi and welcome!  This is my card for the current sketch and color challenges at MFT Stamps.  It's been a while since I've played along with either and I wanted to join in.


To make this card, I started with a panel of Bristol Smooth and ink-blended Limelight and Blu Raspberry inks onto it.  I then adhered it to a white top-folding card base and set it aside.  Onto a panel of white I die-cut three circles to match the sketch.  I then used foam tape to adhere the die-cut piece to the ink-blended card.

The flowers were stamped in the challenge colors and arranged into a bouquet.  They were adhered using a mixture of foam tape and liquid glue.  A separate little flower was added directly to the card panel.  I finished the card with a die-cut "celebrate" liberally coated in clear sparkle pen.


Thanks for visiting!


Products used:

Stamps:  Plentiful Petals (MFT)
Ink:  Black, Coral Crus, Blu Raspberry, Limelight, Cotton Candym, Gravel Gray
Cardstock:  White, Bristol Smooth
Dies:  Plentiful Petals, Pierced Circle Stax, Celebrate (MFT)
Accessories:  Spectrum Noir Clear Sparkle Pen

Thursday 25 April 2019

Wishful Poppies

 Hi and welcome!  It's time for another fabulous sketch from the  Freshly Made Sketches  team and this week Kim Singdahlsen is our sketch hostess and she has a very versatile sketch for us.


I was in the mood to color so decided to make that long vertical panel a floral image.


This stamp (now retired, I think) is from Hero Arts and is fabulous to color as there is so much space to get into.  I am badly out of coloring practice, but I had fun laying down some bold reds on this image.  Once I'd colored the flowers and stems, I added some light gray around the outside of the image and then adhered the panel to a white top-folding card base.  To make the sentiment stand out against the flowers, I backed it with some vellum to provide a bit of separation.


And that's it!  Thanks for visiting.  Head on over to check out the fabulous creations by the rest of the design team.

I'm linking this up to the Retro Rubber Challenge - I've had this floral stamp set for over 3 years (had to go check my SCS gallery to confirm - ha!).  I'm also adding this to the Clean & Simple challenge at A Blog Named Hero.


RRCB 109

ChallengeCleanSimple


Products used:

Stamps:  Delicate Blossoms (Hero Arts) Make a Wish (Clearly Besotted)
Ink:  Amalgam, Versamark
Cardstock:  White, Black, Vellum, X-Press It
Dies:  Infinity Circle Dies (Hero Arts)
Accessories:  Copics, White EP, Sparkling Clear Confetti

Cheers
Karren


Monday 22 April 2019

Mother's Day

Hi and welcome to my first non-DT card in months!  I am getting to the end of a 4-day weekend and have had this idea in my head all weekend and finally got some time in my craft room today to translate it into a card.  This is going to be my card for my mother for Mother's Day, but she's gonna see it here first 😄


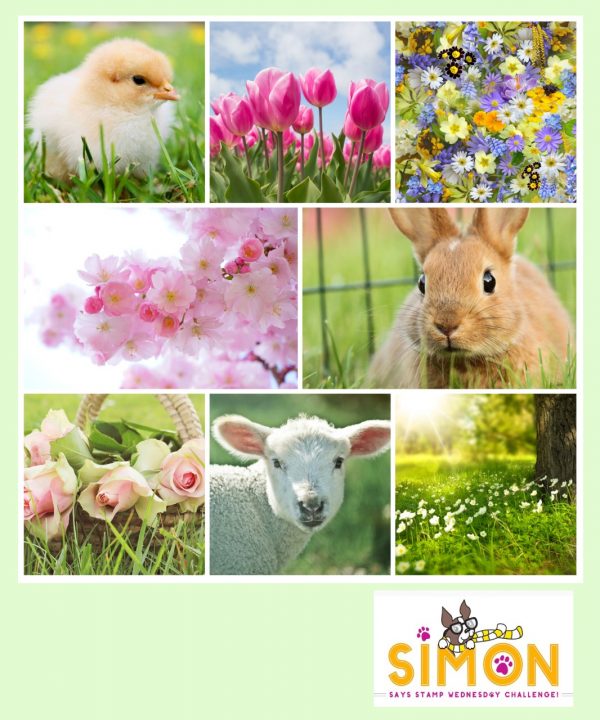
My clean and layered card was inspired by several challenges - the color inspiration at SugarPea Designs, the floral challenge at Krafty Chicks, the Spring Mood Board at Simon Says Stamp and the spring/floral elements from the Card Concept.


I created a bouquet of flowers using the challenge colors and arranged them then added Press n Seal over the top before putting it to one side.  The message board was easy to create as the die does it all for you.  The hardest part was adding all the letters and trying to keep them straight - which they're not!


I added the bouquet and then decided to add some stars as a final touch.  The stars and some of the flowers were colored with clear sparkle pen for some shimmer.  This card is bigger than usual at 5.25 x 5.5" but as I'll be hand-delivering it, it's all good.

Thanks for visiting!


Krafty Chicks Challenge


Stamps:  Funky Wreath Spring Addition (SugarPea Designs)
Ink:  Teeny Bikini, Twinkling Tutu, Willow, Beanstalk, Apricot, Coral Reef, Lemon Chiffon, Duckling, Hollyhock, Jellybean
Cardstock:  White, Black, Grout Gray
Dies:  Letter Message Board (SugarPea Designs), Funky Wreath Spring Addition (SugarPea Designs)
Accessories:  Spectrum Noir Clear Sparkle Pen

Cheers
Karren

Edited to Add:  This card got a shout out at The Card Concept and Krafty Chicks

Friday 19 April 2019

Fishy Trio

Hi!  I'm back with a card for the latest challenge at Fusion.  Check out the new graphic:


I created a sort of fusion by combining most of the sketch with the fish theme from the photo.  I added the horizontal strip behind the three elements rather than in front, but I hope you can still see the sketch.


These fish crack me up!  I stamped and colored them with Copics before die-cutting them.  I masked off a strip on a white card base and blended on some distress inks.  I then added the fish, with the ones at either end popped up on foam tape.  I stamped the simple sentiment before adding Crystal Glaze to all the eyes.


And that's it!  Card done!  I'm heading into a 4 day Easter weekend, so hopefully I'll have enough energy and mojo to spend a chunk of time in the craft room.  It's been about 8 months now since I really wanted to spend time stamping and I'm convinced it's because I'm so busy at work I have nothing left in the tank when I get home!


Thanks so much for visiting!  I hope you'll check out the gorgeous cards made by the rest of the design team.

Products used:

Stamps:  That Bites (Avery Elle)
Ink:  Amalgam, Peacock Feathers Distress Ink
Cardstock:  White, X-Press It
Dies:  That Bites (Avery Elle)
Accessories:  Copics, Nuvo Crystal Glaze

Cheers
Karren

Thursday 18 April 2019

Zig Zag Hello

Hi and welcome!  Today's card was made using the latest challenge from the Freshly Made Sketches team where our hostess this week is Linda Callahan.
I did some emboss-resist for my card, using the gorgeous Roses All Over stamp from MFT. 


After I'd white-embossed the stamp onto some Bristol Smooth cardstock, I blended on some Distress Inks and then die-cut it with a stitched rectangle die.  I then took a chevron die and cut along the bottom for a bit of added interest before mounting it onto a black mat.  Keeping with the black, I cut two strips of cardstock and stamped the same stamp onto them with Versamark ink for a tone-on-tone look (which you can't see in the photos!)


Finally, I finished with a scripty hello.

Thanks so much for visiting!  Head on over and check out how the rest of the DT have interpreted Linda's sketch - they're all wonderful!

Products used:

Stanps:  Roses All Over (MFT) Loads of Wishes (Avery Elle)
Ink:  Versamark, Versafine Onyx Black, Ripe Persimmon, Dried Marigold, Wild Honey, Mustard Seed Distress Ink
Cardstock:  White, Black, Bristol Smooth
Dies:  Stepped Up Chevorn, Stitched Rectangle Stax (MFT)
Accessories:  White EP

Cheers
Karren

Thursday 11 April 2019

Lily

Hi everyone and welcome to my blog.  I'm here with a card for the latest challenge at Freshly Made Sketches.  Our hostess this week is Jen Mitchell and here is her wonderful sketch:


In keeping with my card-making style of the last several months, I went quick and easy and came up with this stenciled and stamp-layered card.


I used multiple Altenew inks to stamp the flower and leaves then used the co-ordinating dies to cut them out.  Onto a white card base, I stenciled through the Dot Fade stencil with some white embossing paste colored with some Altenew gray ink.


After that was dry, I added the sentiment strip, the scalloped piece and the flower with foam tape.

There!  Done!  Nice and quick!

Thanks so much for visiting!  I hope you'll check out the wonderful cards made by the rest of the design team.

I'm linking up to the CAS Stencil challenge where Barb is asking us to use embossing paste.


Products used:

Stamps:  Peruvian Lily (Altenew), Greetings Galore (MFT)
Ink:  Bamboo, Parrot, Olive, Citrus Burst, Fresh Lemon, Maple Yellow, Honey Drizzle, Sunray, Snapdragon, Autumn Blaze, Orange Cream, Sunkissed, Chamomile, Firebrick, Marigold, Cloudy Night - some or all of these - I'm not sure :), Versafine Onyx Black
Cardstock:  White, Cement Gray, Orange Fizz (MFT)
Dies:  Peruvian Lily, Stitched Scallops (Lawn Fawn)
Accessories:  Dot Fade stencil (Tim Holtz), White Embossing Paste

Cheers
Karren

Edited to Add:  This card got a shout out at CAS Stencil

Friday 5 April 2019

Birthday Blend


It's time for another fun challenge from the team at Fusion and we've got a bright and cheery one to play along with!


I originally decided to focus on the photo and go with a rainbow alcohol-inked panel, which I did, but then I figured I could also incorporate the sketch so went with a fusion.


This panel was one I had in my folder of alcohol-ink experiments.  I'm pretty sure I only used a red, green and blue to create this sort-of-rainbow pattern.  I also used some gold foil.  The panel wasn't wide enough to cover a card front, so I cut it behind the sentiment panel to make it fit.  I went with a bold but reasonably simple sentiment stamp and then added a die-cut circle from the inked offcuts and a gold foil star.  Pretty simple, right?


Thanks so much for visiting!  I hope you take the time to check out the cards made by the rest of the design team - they're fabulous!

I'm linking up to Seize the Birthday - this isn't a Spring card but it'll work for the Linky Party.


Products used:

Stamps:  Make a Wish (Clearly Besotted)
Ink:  Versafine Onyx Black
Cardstock:  White, Yupo, Gold Foil card
Dies:  Inside/Out Stitched Stars, Pierced Circle Stax (MFT)
Accessories:  Alcohol Ink

Cheers
Karren

Thursday 4 April 2019

Birthday Bunny

Hi and welcome!  The week is flying by and it's time for another challenge from the team at Freshly Made SketchesJennifer Timko is our hostess this week and she has come up with a classic sketch for us to play with.

I needed a birthday card for my youngest niece so decided to create a wee scene on the smaller of the two rectangles in the sketch (although the sentiment strip is also a rectangle, so let's say the "middle-sized" rectangle 😄)


I first did some masking and ink-blending on the background panel of some Bristol Smooth cardstock to create some grass and sky - leaving a white strip where the "road" was going to go.  I then adhered the die-cut road in place before cutting the houses and trees out of various scraps of cardstock.  I stuck with pastel shades so they didn't take over the card design as it's pretty busy!


The little driving bunny was stamped and colored with Copics before being cut with my Scan n Cut.  I couldn't believe when I saw the SNC had cut a chunk out of the border on the front tyre!  Hopefully my niece won't care, cos I wasn't starting over!  I adhered everything direct to the panel apart from the bunny which is popped up on foam tape.  I'd also like to take this opportunity to point out the the bunny is driving on the correct side of the road... just sayin' 😉


The sentiment was stamped onto a white strip and adhered directly to the card.  The whole panel was then popped up on foam tape and added to a white card base.

Thanks so much for visiting!  I hope you'll check out the gorgeous creations made by the rest of the DT.

Products used:

Stamps:  Sweet Somebunny (MFT)
Ink:  Amalgam, Versafine Onyx Black, Broken China, Shabby Shutters, Twisted Citron Distress Inks
Cardstock:  White, X-Press It, Bristol Smooth, various colored scraps (mostly SSS)
Dies:  Open Road, Home Sweet Hone (MFT)
Accessories:  Copics, Mini Cloud Edges Stencil (MFT)

Cheers
Karren