Welcome to the last Fusion challenge of 2021. I played with the colours from the photo and also pulled in the general theme of the sketch to come up with this card.
I had just received this Fancy Star Builder stamp set and wanted to try it out, so I grabbed some gray inks and a panel of white cardstock and just had fun. Once I'd stamped the stars, I cut the panel with a frame die and then embossed the sentiment into the centre piece.
To put the card together, I took a Fog card base and adhered the outer most stamped layer directly to that. I then used two layers of foam adhesive for the frame and a single layer for the centre piece, so they're all at different heights, which is hard to see in the photo.
I finished with some gray star enamel accents and called it done.
I hope you'll check out the wonderful cards made by the design team and find time to play along with us.
Products used:
Stamps: Fancy Star Builder (Altenew)
Ink: Rock Collection, Gentleman's Gray set (Altenew), Versamark
Cardstock: White, Fog (SSS)
Dies: Nesting Rectangle Frames (Waffle Flower)
Accessories: Liquid Platinum EP (Ranger), Rock Collection Enamel Dots
Welcome to my blog! Today's card is for the latest Freshly Made Sketch challenge, where our hostess this week is Jen Brum. I made another Christmas card, purely because I just received some washi tape that I wanted to try out!
I had previously purchased the stamp set, stencils and die that match this washi and didn't buy the washi, but decided it makes for quick and easy cards, so added it to my next order. Of course, I had to test it out when I received it and this card uses one of the die-cut elements from that test session. I added a matte gold strip of cardstock under the bouquet, a small and simple sentiment and some subtle dry embossing using the Subtle EF and finished with some Copic-coloured pearls. All done!
Thanks so much for visiting. I hope you'll check out the wonderful cards made by the rest of the design team.
Hi! I had a bit of extra time today so decided to make a card for a few challenges. Color Hues is looking for Gold and Silver, Time Out Challenges has a quote (where I think I've covered the "simplicity" and "sophistication" aspects) and Happy Little Stampers Anything Goes with Dies challenge.
For this card I created a background panel using the Deco Triangles Hot Foil Plate and some vintage matte gold foil. Once it was foiled, I die-cut it with a stitched rectangle die and matted it to a black panel.
For the sentiment, I die-cut the Hello word twice from black and once from silver foil cardstock and layered them together. I used the negative die-cut to align it on the hot foiled panel.
To finish the card, I white-embossed a sub-sentiment and added it under the Hello.
Thanks so much for visiting!
Products used:
Stamps: Lots of Hugs (MFT)
Ink: Versamark
Cardstock: White, Black, Silver Foil
Dies: Big Hello, Stitched Rectangle Stax (MFT), Deco Triange Hot Foil (The Greetery)
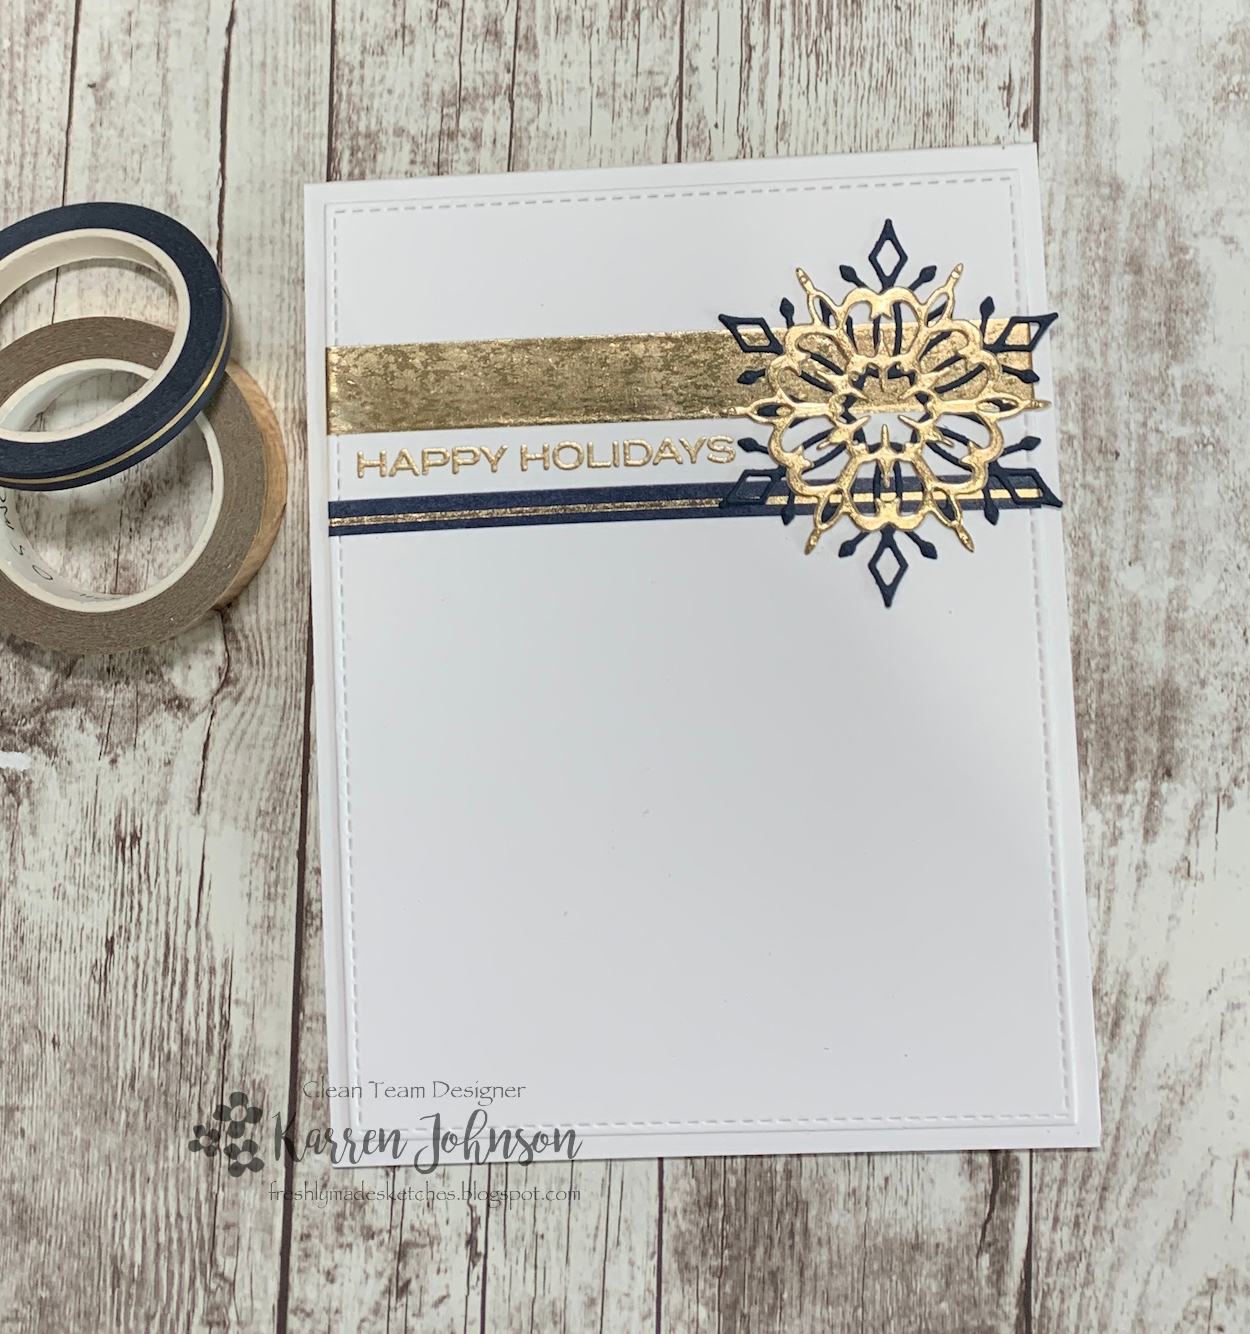
Just a quick post today as I'm rushing out the door! This card uses the latest sketch from Freshly Made Sketches where our hostess is Kim Singdahlsen. I went for a quick and easy washi tape card to come up with this:
The navy and gold washi tapes are from Altenew and I applied strips above and below the gold-embossed sentiment, before adhering the panel to a white card base. The gold snowflake was made from white cardstock covered in gold washi and the navy snowflake was made with cardstock.
And that's it! Clean, simple and elegant. Thanks for visiting. I hope you'll check out the cards made by the rest of the design team.
Hello and welcome! I was thrilled when Jeanne Jachna asked me to be a guest for the monthly Waffle Flower challenge. The theme is non-traditional colours which I was so excited with as red and green is not my favourite colour combo 😄
To top it off, we get to use gorgeous Waffle Flower products. I had a hard time narrowing my choices down for my card and actually ended up making three cards - although one is a bonus of another.
Anyway, enough chatter, let's get to the cards.
For my first card, I wanted to focus on the gorgeous and modern Spotlight Holiday Elements stamp set. I decided to create my own background using various monochromatic inks and a home-made stencil (and I have a video showing how I did this, if you're interested). After I made my panel and let it dry, I positioned the berry branch image and sentiment in my Misti and stamped it with Versafine Onyx Black ink. Without moving the stamp, I then placed a white card base into the Misti and stamped the same image.
Using Waffle Flower's Nesting Rectangle Frames die, I die-cut a frame from the ink-blended and stamped panel and carefully removed it. I then adhered the outer and inner pieces left from the ink-blended panel to the white card base, being careful to match the stamping with what was on the card base. It helped to use the die-cut frame as a placement guide and then removing it after the other pieces were placed. The outer frame was adhered directly to the card base and the inner piece was popped up on foam tape for some added dimension.
To use the leftover die-cut frame, I stamped a second white card base with the berry branch image (having left it in the Misti, I knew it was going to be in the correct position). I added liquid glue to the frame and adhered it, again aligning the image. As this card was going to be posted, I didn't add dimension, but this would look cool with foam tape behind the frame.
To finish both cards, I added gray enamel dots to the inner frame card and white enamel dots to the outer frame card. But I wasn't finished there - I had so many wonderful products to play with, I made another card using the same ink-blending technique but with a completely different result.
For this card, I used yellow, orange and pink inks to create my background. I then die-cut the gorgeous Mistletoe Panel Die three times from white cardstock and once from the Modern Neutrals Pattern Paper (be still, my heart!). I layered all together and adhered them to the inked panel. I then stamped and Copic-coloured the candy image from Christmas Tag Elements using a similar colour scheme. After die-cutting the image and stamping and die-cutting the sentiment from Wonderful Christmas, I added both to the card front. Finally, I added the panel to a white card base and finished with some enamel dots in matching colours.
Phew! This was a long post! Thanks for sticking with me. And thanks also to Jeanne for inviting me and to Waffle Flower for their generosity (not to mention fabulous products). If you want to see how I made my ink-blended panel check out the video below or over at my YouTube channel.
Products used (gray cards):
Stamps: Spotlight Holiday Elements (Waffle Flower)
Ink: Versafine Onyx Black, Unicorn White (Hero Arts), Pumice Stone, Smoked Hickory, Black Soot Distress Oxide Inks
Cardstock: White, Bristol Smooth
Dies: Nesting Rectangle Frames Die (Waffle Flower)
Accessories: Enamel Dots
Products used (pink/orange card):
Stamps: Christmas Tag Elements, Wonderful Christmas (Waffle Flower)
Hi and welcome to the second-to-last Fusion challenge for the year. Today I chose to primarily play along with the sketch but also pulled in a couple of colours from the photo.
There's lots of glitter paper on this card so it's very sparkly! To make this card, I die-cut the silver glitter panel first using the Circle Trio Shaker dies and then used those cut-outs to position the snowflake die on the white panel. The snowflake die cuts out the snowflake from the main panel leaving behind the negative space which is a cool look. I then cut the outer frame circle 9 times and stacked three together to create three circles.
I stamped the sentiment and then assembled the card, placing some blue sparkle paper behind the snowflake cut-outs.
Thanks so much for visiting. I hope you'll check out the wonderful cards made by the rest of the design team.
Products used:
Stamps: Merry Mistletoe (SSS/Avery Elle)
Ink: Versafine Onyx Black
Cardstock: White, Silver Sparkle, Blue Sparkle (MFT)
Dies: Circle Trio Shaker (MFT), Christmas Circle Cutouts (Impression Obsession)
I'm here with a new challenge from the team at Freshly Made Sketches where our hostess this week is Linda Callahan. I made another Christmas card with some new goodies from PinkFresh Studio.
The flowers were stamped and coloured using layering stencils then die-cut. I die-cut a postage frame and gold-embossed the sentiment before adding the panel with foam tape to a Fog card base I'd dry-embossed with the Subtle embossing folder.
I added the poinsettia images and finished by colouring the flowers with clear sparkle pen and adding some pearls I coloured with a Copic marker.
Thanks for visiting. I hope you'll check out the rest of the DT cards - they're fabulous!
Welcome to my blog! It's time for another Freshly Made Sketches challenge where this week our hostess is Jen Mitchell. She has given us lots of layers to play with.
My card didn't photograph well - I think it might have been the foiling but trust me, it's white! I hot-foiled some silver foil onto a panel using the Slimline Confetti die and added that to a white card base.
The "thanks" die doesn't cut the outside edge, so I took a slightly larger circle die and taped them together before die-cutting three times from white cardstock. I then stacked them together and added it to my card.
And that's it! Thanks so much for visiting. Please head over and check out the DT cards.
Products used:
Cardstock: White, Silver Hot Foil
Dies; Circled Greetings: Thanks (Altenew), Infinity Circle Dies (Hero Arts), Infinity Rectangle Dies (Hero Arts), Slimline Confetti (Spellbinders)


