Wednesday, 10 October 2012

CAS Fall Foliage

Here is my second card today.  This card covers the color challenge at Pals Paper Arts and the free-for-all sketch challenge at iSpy Sketches.


I used sketch 26 from iSpy and chose to go with a masked sponged panel and a couple of cut out leaves for embellishments.

I masked the card base and then sponged More Mustard in varying degrees of intensity.  From about 2/3 down the panel I sponged Cajun Craze from light to dark.  With the masks in place, I then stamped the text stamp from French Foliage in Crumb Cake randomly over the panel, followed by leaves and splatters using Early Espresso ink.

The cut out leaves were colored using markers and then sponged over the top.  I used the side of my Cajun Craze marker to outline both leaves.  To make them stand out a bit more from the sponged panel I popped a 1 3/4" circle underneath.  


Thanks for looking.

Products used (all Stampin' Up!):

Stamps:  French Foliage; Teeny Tiny Wishes
Cardstock:  Whisper White
Ink:  More Mustard; Cajun Craze; Early Espresso; Crumb Cake
Accessories:  More Mustard, Cajun Craze markers; Linen Thread; 1 3/4" circle punch

Cheers
Karren


Halloween Kid

Today marks the beginning of a 5 day weekend for me - yay!  Having said that, I have a whole heap of chores to do and I've just found out the insurer is planning on digging up our driveway and path tomorrow as a result of the earthquake damage from Sep 10 and Feb 11, so it's going to be headache material around here, methinks!

Anyway, while it's quiet I managed to make a card for the sketch challenge at Fab Friday and the theme challenge at Hand Stamped Sentiments.

We don't celebrate Halloween, but this cute kid just needs to be stamped and colored.


I used the color coach for colors that worked with Pumpkin Pie and it gave me Daffodil Delight and Early Espresso.  I substituted Basic Black for the Espresso and I quite like the contrast.  

I colored my girl with markers and blender pen then cut out and mounted onto a Basic Black layer.  Once I had the banners and stamped image on the card, I decided to add some little rolled roses and leaves as embellishments.


Thanks for looking.

Products used (all Stampin' Up! unless otherwise stated):

Stamps:  Greeting Card Kids
Cardstock:  Basic Black; Watercolor Paper; Daffodil Delight; Pumpkin Pie; Old Olive
Ink:  Black Stazon
Accessories:  Basic Black, Daffodil Delight, Pumpkin Pie, Old Olive, Crumb Cake, Early Espresso, Going Grey, Blush Blossom markers; 1 1/4" circle punch; Basic Pearls, Little Leaves Sizzlet; circle nesties; MFT Fishtail Flags

Cheers
Karren


Sunday, 7 October 2012

An Oldie but a Goodie

This is my last card of the day (and weekend).  I really wanted to use the sketch from Create with Connie & Mary before the challenge closed as well as the color combo at Color Me Beautiful.  With that in mind, I decided to go fresh and clean and pulled out one of my oldest stamp sets Definitely Decorative Daisy.


Hmmm, doesn't look very fresh and clean, does it?  Once I had the main panel stamped, I thought it was lacking something.  So I dug around in one of my plastic tubs of rarely used stamps and pulled out my Linen background stamp.  Once I'd stamped over the main panel, my card was going to be anything but fresh and clean, so I decided to go all out and try and meet the criteria of texture over at SUO Challenges.

I textured everything!  Using either Linen background, the distressing tool or the Finial Press Embossing Folder, it was textured LOL.

The daisy was stamped using Pink Pirouette stamped full strength and Regal Rose stamped off.  The leaves were Always Artichoke full strength and then stamped off.  The only color I didn't use was Certainly Celery.

The banners were embossed then lightly sponged with Crumb Cake ink to highlight the embossing.  The ends were curled slightly to add to the texture theme.


Thanks for looking.

Products used (all Stampin' Up!):

Stamps:  DD Daisy; Linen; Bring on the Cake
Cardstock:  Basic Gray; Whisper White; Regals, Brights and Subtles DSP
Ink:  Pink Pirouette; Regal Rose; Always Artichoke; Basic Gray; Crumb Cake
Accessories: Sponge; Distressing Tool; Finial Press EF; Basic Pearls

Cheers
Karren

Summer Starfruit

The challenge at Just Add Ink this week got me pulling out my Summer Starfruit cardstock for the first time.  It goes really well with Basic Gray and Whisper White.  I used last week's sketch from Simply Stampin' Challenges to come up with a very simple birthday card.


I punched circles out of the Basic Gray papers from Twitterpated and also the Neutrals DSP.  I popped the sentiment circle up on Dimensionals and also added a bit of Summer Starfruit ribbon.  The sentiment is white embossed.

Thanks for looking.


Products used (all Stampin' Up!):

Stamps:  Petite Pairs
Cardstock:  Summer Starfruit; Whisper White; Twitterpated DSP; Neutrals DSP
Ink:  Versamark
Accessories:  White EP; Summer Starfruit ribbon

Cheers
Karren


CAS Flower

As it's a lovely Spring day today, I went summery with my card for the challenges at Freshly Made Sketches and Dynamic Duos.  Even though I'm not a fan of orange, I do quite like Tangerine Tango.  How come then, that I never use it?


Because I wanted to keep my card light, I went with Bakers Twine rather than the panel across the top.  I used the Blossom Builder Punch and Build a Blossom set to make the flower.  I realize that in nature green flowers with an orange center would be a rare sight, but I took some artistic license here LOL.  


Thanks for looking.

Products used (all Stampin' Up! unless otherwise noted):

Stamps:  Build a Blossom; Signature Greetings (PTI)
Cardstock:  Whisper White; Brights DSP
Ink:  Old Olive; Tangerine Tango
Accessories:  White Bakers Twine; Blossom Builder Punch; MFT Fishtail Flags Die

Cheers
Karren

Edited to Add:  This card was chosen as one of the Dynamic Darlings this week.  Thanks, guys!


Thursday, 4 October 2012

Dynamic Duos #22

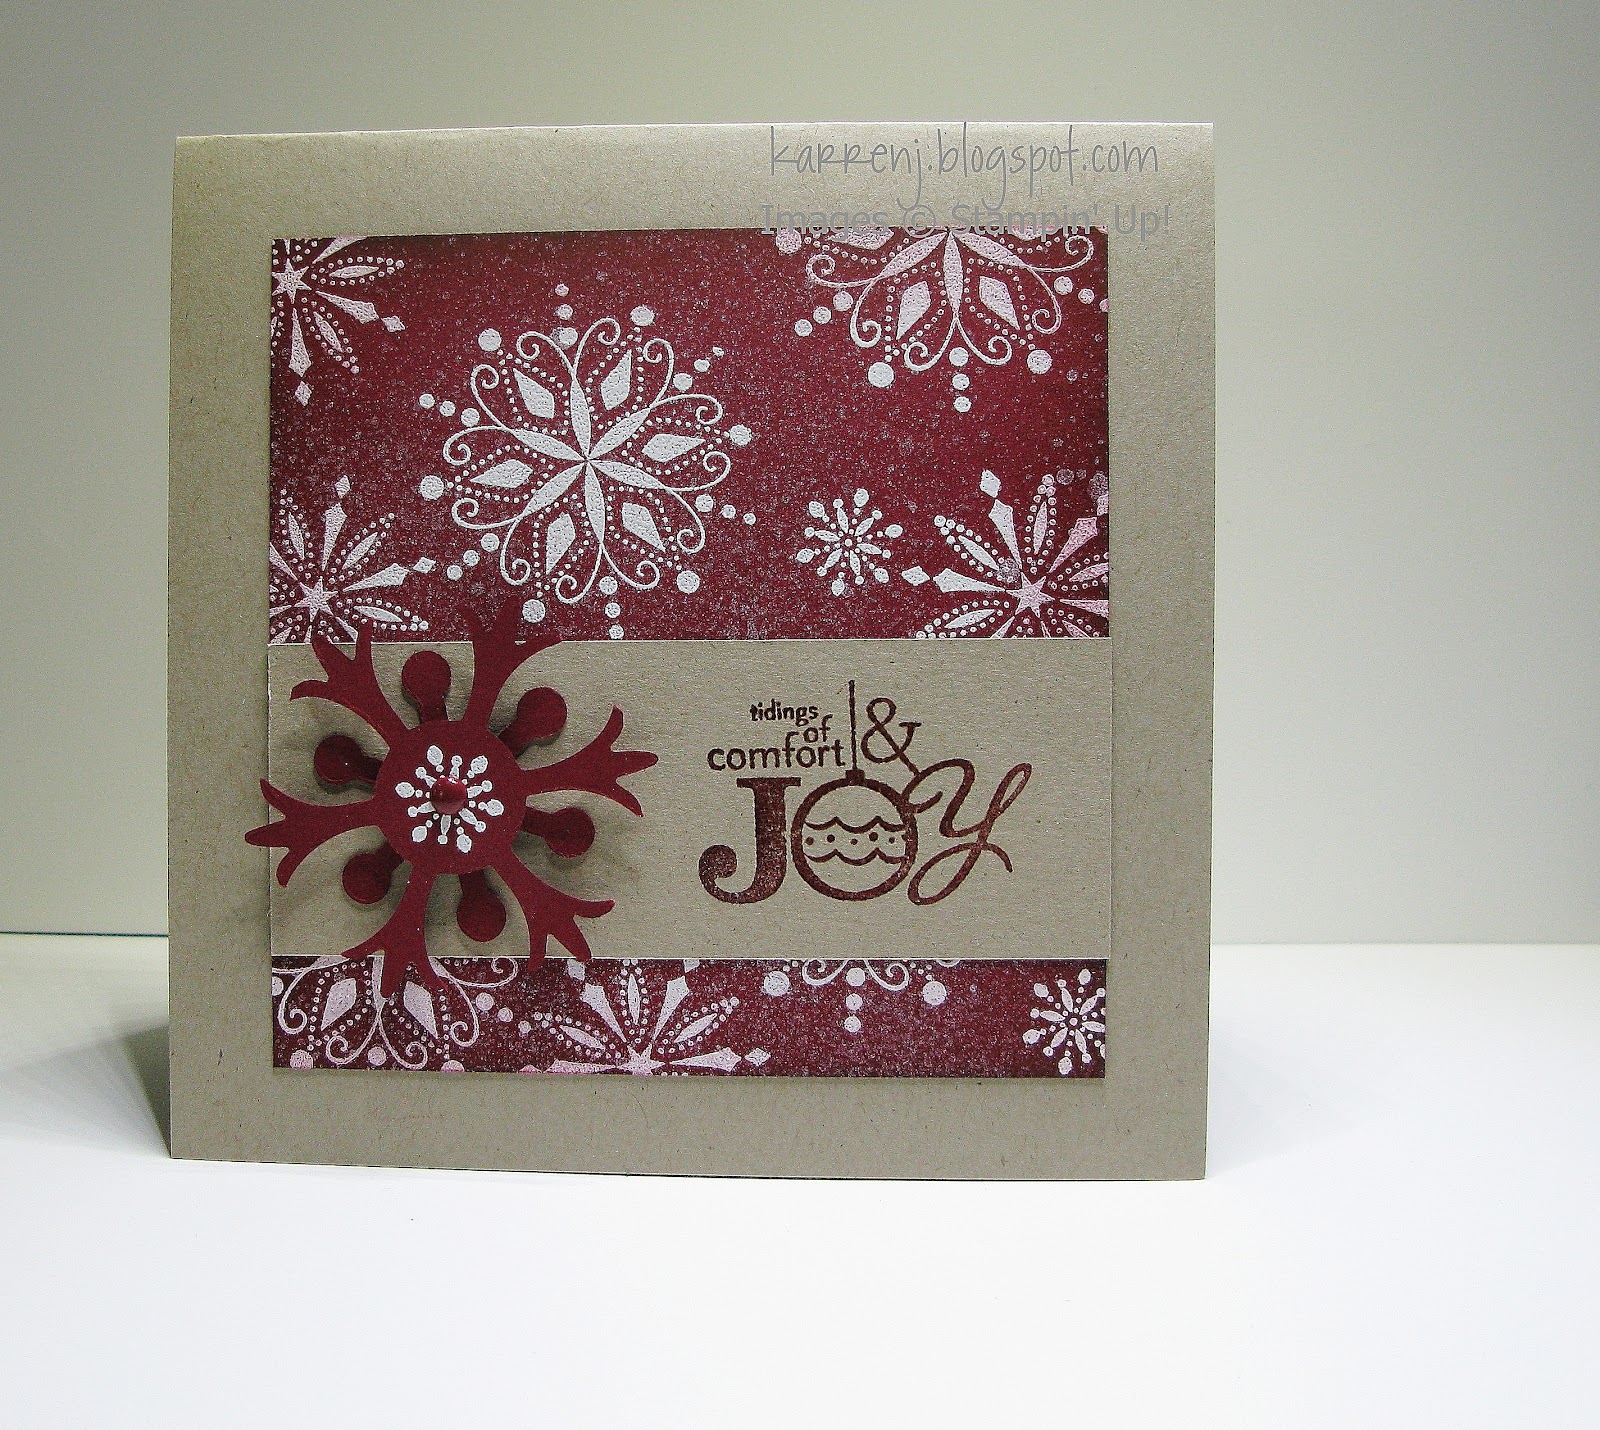
Here is my submission for this week's Dynamic Duos color challenge.  I chose to pair up Cherry Cobbler with Crumb Cake and make another Christmas card.  I also used last week's sketch from Freshly Made Sketches.


I stamped and white embossed the snowflakes onto the Cherry Cobbler card, then sponged round the edges with Cherry Cobbler ink.  I then lightly spritzed the layer with Vanilla Smooch Spritz, which gives the piece a look of snow falling in the background (in my mind, anyway LOL).  The snowflake embellishment is made using the two smallest dies in the new Snowflake Bigz die, with the smallest die cut at the back.  On the bigger die cut, I white embossed the smallest snowflake and then used a Cherry Cobbler brad to hold it together.  The sentiment is stamped with Cherry Cobbler ink and clear embossed.


Thanks for looking.

Products used (all Stampin' Up!):

Stamps:  Snow Swirled; Word Play
Cardstock:  Crumb Cake; Cherry Cobbler
Ink:  Versamark; Cherry Cobbler
Accessories:  White EP; Clear EP; Vanilla Smooch Spritz; Snowflake Bigz Die; Regals brads

Cheers
Karren


Wednesday, 3 October 2012

My Stamp Room - Before & After

As I mentioned in an earlier post, I managed to persuade my DH that moving my stamp room from the 4th bedroom to the formal lounge was a good idea (I can be very persuasive LOL).  The boys had been using the formal lounge as their games room, ie Playstation, etc and a place to store their junk.  My argument to swap rooms played on the fact that I'd be doing everyone a favour to take over the big room so that the boys had a smaller room to mess up.  Well, blow me down, but that argument worked!

Our 4th bedroom is downstairs with the living areas, but is only 3.5m square (about 11.5' to my imperial readers).  The formal lounge is considerably bigger at 6.0m x 4.1m (20' x 13.5').  Unfortunately not all the furniture from the lounge was going to fit in the new games room so the 3-seater couch remains in the lounge.  As well, there's a pile of "stuff" in one corner that we still need to find a home for and boxes and boxes of Lego that need putting in the attic for the grandkids we'll hopefully have one day in the very distant future!

So here are some before photos:


This first photo is the view from the doorway.  My desk is in the center of the room so that my son can sit on the other side and stamp which, now that he's 10, happens less frequently.  You'll see under my desk that I have to keep my rubbish tin up out of the puppy's way.  Ask me how I learned that little lesson LOL.


This photo is to the left of my desk and is of the credenza which matches the rimu desk I scored from work many years ago.  This is where I store my Big Shot dies and machine as well as my current inkpads.  Underneath are all my ribbon holders and a few drawers for envelopes and catalogues.


These 8-cubby bookcases are great for storing my stamp sets and other miscellaneous stuff.  I had 4 of them in the room.  I used to have 5 but put about 150 stamp sets into storage containers so moved out one of the bookcases.  It might need to find its way to my new room very shortly to store new stamps...


This photo is to show my old style punch storage.  My darling DH made these holders for me, using some metal strips (exactly like a metal ruler), long screws and some rubber lugs to keep them out from the ends of the bookcase.  I have these on the ends of two bookcases.


This is just a close-up photo of my desk - pretty clean and tidy for once.


A front-on view of my Big Shot area.  At the moment I only have one of the Big Shot storage boxes, so I took the dividers out and use the base on its side for my Bigz dies and the lid with one of the dividers in it for my embossing folders, framelits etc.  As an aside, the artwork on the wall in this photo is something I found on Pinterest and made using foamboard and Night and Day DSP.


Excuse the mess on either side of these 12x12 paper holders.  They were in the closet.  These are great for storing my DSP and the protective covers keep them shaded from the light.  Unfortunately you can't move them with all the paper in - so I had to painstakingly unload each shelf before I could move the units into my new room.  The paper didn't go back in the same order, so a job I need to do is sort out all my DSP again.  Oh joy!

So that's my old room.  Now here are some photos of my new room.


This is the view behind my desk looking towards the white double doors.  On the other side of the doors is the kitchen/dining/family room, so I can open the doors while I'm stamping and still know what the rest of the family is up to.  I had to keep the desk in the center of the room because William still insists on his side of the desk for stamping - even though he rarely uses it now.  But I have more space around the desk which makes moving around much easier.  Our Bichon puppy, Dexter, managed to get his bum in this picture!


Behind my desk I have my A4 cardstock in the red filing cabinet; my 12x12 in the 2 paper holders I showed you before and to the left of that is another 2 drawer filing cabinet I use for extra cardstock, plus my receipts, etc.  The top of that has become my storage place for my Tonic cutter and Simply Scored. I've also spread out my Big Shot stuff a bit and am using the top of the red filing cabinet for my Big Shot machine.

Behind this row of storage are the remains of the old "lounge".  Some of the stuff I need to find another home for and some will stay here.  It's probably about 1/3 of the whole room.


On the left of the desk is my credenza, with all the same stuff in and on it as the other room, excluding the Big Shot.  Behind the credenza are 4 huge plastic tubs with my rarely used stamp sets.  All my non-Stampin' Up stamps are still stored in the cupboard under the stairs.  I would like to move them into this room, but not sure where to put them, as I have hundreds of them (yes, I'm a collector LOL).


A view of 3 of my 4 bookcases.  I still need to work out how best to position things for ease of use, but that will come with time and use.  I don't make 3-D items very often because I find I don't know what to do with them when I do make them, so the few things I've made are on top of one of the bookcases.  Extra wheel storage boxes are on another.


Another view of my punch storage.

So that's it.  My new room.  It's a bit hard to get the space difference in perspective but trust me, I have way more space, so I'm a happy stamper!

Thanks for getting this far!

Cheers
Karren